글 목록을 만들어보자!
필자는 늙은이라서 네이버나 티스토리 같은 UI에 익숙하다. 거기엔 글 목록이 있었는데 왜 Chirpy에는 없을까? 우리 함께 글 목록을 만들어서 배치해보자.
글 목록을 만드는 것은 생각보다 어려운 일이 아니다. 이미 Chirpy 홈 화면에서 카테고리를 누르면 매우 유사한 글 목록이 있는 것을 볼 수 있다. 물론 여기는 카드 형태지만 말이다. 이 시스템에서 우리는 Chirpy 시스템 내에 이미 전체 게시글의 메타데이터를 긁어오는 기능이 존재한다는 것을 알 수 있다. 이 기능을 응용하면 글 목록을 만드는 것은 비교적 쉬운 일이다. 그러나 건드려야 하는 파일들이 많기 때문에 차근차근 따라가도록 하자.
Chirpy 테마의 기능을 응용하기
모듈러 구조의 이해
Chirpy 테마는 좌측 패널에 들어있는 아바타 표시 기능, 각종 탭 표시 기능, 좌측 하단의 SNS 링크 기능, 메인 화면의 기능, 우측 패널의 기능 (최근 업데이트 게시글 및 인기 태그 표시) 모든 것이 모듈화 되어있다. 그렇기 때문에 이 구조만 잘 파악하면 아주 행복한 커스터마이징이 가능하다! 이런 모듈들은 모두 _includes/ 폴더에 잘 정리 되어있다. 서두에서 말헀던 것처럼 우리는 기존에 존재하는 전체 게시글의 메타데이터를 긁어오는 기능을 활용하겠다.
이미 있는 기능 재활용하기
전체 게시글의 메타데이터를 긁어오는 기능은 _includes 폴더에 존재하지 않는다. 이것은 모듈화 된 기능이 아니다. 해당 기능은 _layout/categories.html 파일에 존재한다. 약간은 어려울 수 있겠지만 한번 파일 구조를 파악해보자.
Categories.html 파일의 구조
우리가 필요한 부분은 5번부터 141번까지다. 결국 우리는 아래의 홈페이지 가운데에 위치한 이 페이지를 우측 패널에 구겨넣겠다는 것이다.
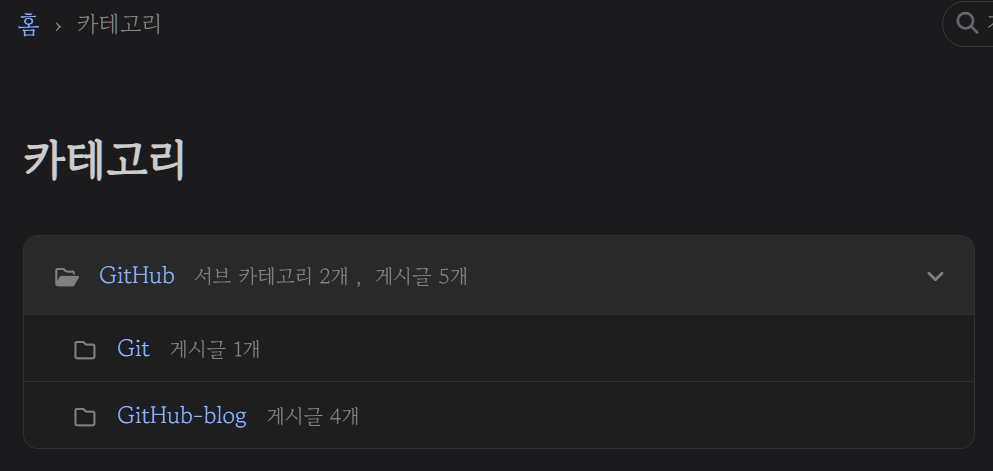 내가 만든 블로그의 카테고리 탭 메인 화면이다. 우측 패널에 구겨넣겠다.
우선 Categories.html의 구조 파악으로 우리가 필요한 부분과 불필요한 부분을 판단해보도록 하자. 물론! 현재 우리는 우측 패널에 넣을 수 있도록 파일을 모듈화 해야한다.
- 따라서 우리는
_includes폴더에 새로운html파일을 만들어 줄 것이다. - 필자는 마침
Categories_list.html파일이 비어있고 다른 곳에서 사용하는 것 같지 않아서 이걸 이용하기로 했다. - Categories.html에 있는 코드를 5번부터 141번까지 복사하여 Categories_list.html에 붙여넣자.
1
2
3
4
5
6
7
8
9
10
11
12
13
14
15
16
17
18
19
20
21
22
23
24
25
26
27
28

{% include lang.html %}

{% assign HEAD_PREFIX = 'h_' %}
{% assign LIST_PREFIX = 'l_' %}
{% assign group_index = 0 %}
{% assign sort_categories = site.categories | sort %}
<!-- 여기부터는 조금 다른 접근이 필요하다 -->
{% for category in sort_categories %}
  {% assign category_name = category | first %}
  {% assign posts_of_category = category | last %}
  {% assign first_post = posts_of_category | first %}

  {% if category_name == first_post.categories[0] %}
    {% assign sub_categories = '' | split: '' %}

    {% for post in posts_of_category %}
      {% assign second_category = post.categories[1] %}

      {% if second_category %}
        {% unless sub_categories contains second_category %}
          {% assign sub_categories = sub_categories | push: second_category %}
        {% endunless %}
      {% endif %}
    {% endfor %}

    {% assign sub_categories = sub_categories | sort %}
    {% assign sub_categories_size = sub_categories | size %}
5번부터 32번까지는 모두 변수를 선언하고 필요한 부분들을 긁어오는 기능들이다. 글 목록을 지칭하는 단어도 사이트의 lang.html에 따라 다르게 표시되게 만들 것이기 때문에 여기 있는 모든 부분이 필요하다. 그런데 주석 처리된 저 부분부터 약간의 변형이 필요하다. 모듈화를 위해서 이곳에 <section> </section> 구조를 넣어줘야 한다. 주석 처리된 곳에 <section>을 넣고 맨 아래에 </section> 을 추가하여 모든 것들을 하나의 섹션으로 인식할 수 있게 만들어주자.
그리고 글 목록에 대한 제목을 넣어야 하기 때문에 <section> 아래에 한 줄의 코드를 추가하자.
1
  <h2 class="panel-heading">{{ site.data.locales[lang].post.postlist }}</h2>
이것은 패널에 있는 Heading을 추가하고 사이트의 언어에 맞춰서 postlist 변수를 읽어서 보여준다.
- 여기까지 진행했다면
ko-KR.yml파일과en.yml파일도 알맞게 수정해주자. 아래의 코드를 참고하자.
1
2
3
4
5
6
7
8
9
10
11
12
13
14
15
16
17
18
19
20
21
22
# ----- Posts related labels -----
post:
  written_by: 저자
  posted: 게시
  updated: 수정
  words: 단어
  pageview_measure: 조회
  read_time:
    unit: 분
    prompt: 소요
    head_line: 읽기
  relate_posts: 관련된 글
  share: 공유하기
  button:
    next: 다음 글
    previous: 이전 글
    copy_code:
      succeed: 복사되었습니다!
    share_link:
      title: 링크 복사하기
      succeed: 링크가 복사되었습니다!
  postlist: 글 목록 # 하나 추가했다.
불필요한 부분 제거 및 수정
이제 천천히 수정를 시작해보자. 우선 원본 파일에 있는 주석 처리된 <!-- top-category --> 부분부터 확인해보자. 해당 부분은 bootstrap 기능을 이용해서 특정 클래스가 선언되면 자동으로 스타일이 적용되게 만들었다. 특히 카드로 표시되게 만들었다. 우리는 우측 패널에 카드를 넣을 것이 아니기 때문에 여기 있는 class 선언부터 고쳐줘야 한다. 필자는 모두 post-list 같은 꼴로 변경했다. 아래의 변경 후 코드를 참고하자.
1
2
3
4
5
6
7
8
9
10
      <div class="post-list">
        <!-- top-category -->
        <div
          id="{{ HEAD_PREFIX }}{{ group_index }}"
          class="post-list-head"
        >
          <span class="ms-2">
            <i class="far fa-folder{% if sub_categories_size > 0 %}-open{% endif %} fa-fw"></i>
            {% capture _category_url %}/categories/{{ category_name | slugify | url_encode }}/{% endcapture %}
            <a href="{{ _category_url | relative_url }}" class="pos-list-2">{{ category_name }}</a>
여기서 만든 class 이름은 어디 적어두거나 기억하도록 하자. 나중에 css 파일로 스타일을 손봐야 한다. 다음은 <!-- content count --> 부분이다. 이건 복수형 단어와 단수형 단어를 구분해야만 하는 영어의 특성 때문에 어렵게 적힌거지, 사실은 되게 간단하다. 게시글 개수가 몇 개인지 파악하고 1개를 초과하면 복수형 단어를 쓰고 아니면 단수형으로 나타나게 만든거다.
- 우리는 (‘숫자’) 꼴로만 나타낼 예정이기 때문에 과감하게 쳐내도 된다. 변경 후에는 아래와 같은 코드가 될 것이다.
1
2
3
4
5
6
7
8
9
 <!-- content count -->
            {% assign top_posts_size = site.categories[category_name] | size %}
            <span class="text-muted small font-weight-light">
              {{ '(' -}}
              {{ top_posts_size }}
              {{- ')' }}
            </span>
          </span>
        </div>
<!-- arrow -->부분은 하등 쓸모 없다. 우리는 접었다 폈다 할 것이 아니기 때문에 이런 아이콘과 애니메이션 효과는 필요하지 않다. 과감하게 모두 제거하자.- 남은 것은
<!-- Sub-categories -->부분이다. 마찬가지로 뭐가 어렵게 적힌 것 같지만 전혀 아니다.for문으로 반복 구조문 만들고 아이콘을 넣어주고, 이름을 넣고 이름에 맞게 링크로 이동하는 그런 것 뿐이다. 아래에도 복수형, 단수형에 따라서 이름을 이상하게 넣으려고 하는거다. 우리는 전부 다 과감하게 쳐내면 된다. 물론 중간에 서브 카테고리 클래스가mx-2로 선언 되어있는데 이것만 바꿔주자.mx-2는 스타일이 너무 안 맞는 것 같더라.. 수정 후에는 아래와 같은 코드가 될 것이다.
1
2
3
4
5
6
7
8
9
10
11
12
13
14
15
16
17
18
19
20
21
22
23
<!-- Sub-categories -->
        {% if sub_categories_size > 0 %}
          <div id="{{ LIST_PREFIX }}{{ group_index }}" class="collapse show" aria-expanded="true">
            <ul class="post-list-group">
              {% for sub_category in sub_categories %}
                <li class="post-list-group-item">
                  <i class="far fa-folder fa-fw"></i>

                  {% capture _sub_ctg_url %}/categories/{{ sub_category | slugify | url_encode }}/{% endcapture %}
                  <a href="{{ _sub_ctg_url | relative_url }}" class="pos-list-2">{{ sub_category }}</a>

                  {% assign posts_size = site.categories[sub_category] | size %}
                  <span class="text-muted small font-weight-light">
                    {{ '(' -}}
                    {{ posts_size }}
                    {{- ')' }}
                  </span>
                </li>
              {% endfor %}
            </ul>
          </div>
        {% endif %}
      </div>
1단계 준비 완료, 우측 패널 글 목록 모듈 완성!
이러면 모듈 준비는 끝났다. 완성된 최종 코드는 아래와 같다.
1
2
3
4
5
6
7
8
9
10
11
12
13
14
15
16
17
18
19
20
21
22
23
24
25
26
27
28
29
30
31
32
33
34
35
36
37
38
39
40
41
42
43
44
45
46
47
48
49
50
51
52
53
54
55
56
57
58
59
60
61
62
63
64
65
66
67
68
69
70
71
72
73
74
75
76
77
78
{% include lang.html %}
{% assign HEAD_PREFIX = 'h_' %}
{% assign LIST_PREFIX = 'l_' %}
{% assign group_index = 0 %}
{% assign sort_categories = site.categories | sort %}

<section>
  <!-- 아래의 것은 언어파일과 연동하여 글 목록을 표시한다. -->
  <h2 class="panel-heading">{{ site.data.locales[lang].post.postlist }}</h2>
  {% for category in sort_categories %}
    {% assign category_name = category | first %}
    {% assign posts_of_category = category | last %}
    {% assign first_post = posts_of_category | first %}
    {% if category_name == first_post.categories[0] %}
      {% assign sub_categories = '' | split: '' %}
      {% for post in posts_of_category %}
        {% assign second_category = post.categories[1] %}
        {% if second_category %}
          {% unless sub_categories contains second_category %}
            {% assign sub_categories = sub_categories | push: second_category %}
          {% endunless %}
        {% endif %}
      {% endfor %}
      {% assign sub_categories = sub_categories | sort %}
      {% assign sub_categories_size = sub_categories | size %}

      <div class="post-list">
        <!-- top-category -->
        <div
          id="{{ HEAD_PREFIX }}{{ group_index }}"
          class="post-list-head"
        >
          <span class="ms-2">
            <i class="far fa-folder{% if sub_categories_size > 0 %}-open{% endif %} fa-fw"></i>
            <!-- 카테고리 이름을 따와서 표시해주는 것이기 때문에 무조건 있어야 하는 코드 -->
            {% capture _category_url %}/categories/{{ category_name | slugify | url_encode }}/{% endcapture %}
            <a href="{{ _category_url | relative_url }}" class="pos-list-2">{{ category_name }}</a>

            <!-- content count -->
            {% assign top_posts_size = site.categories[category_name] | size %}
            <span class="text-muted small font-weight-light">
              {{ '(' -}}
              {{ top_posts_size }}
              {{- ')' }}
            </span>
          </span>
        </div>
        <!-- .card-header -->

        <!-- Sub-categories -->
        {% if sub_categories_size > 0 %}
          <div id="{{ LIST_PREFIX }}{{ group_index }}" class="collapse show" aria-expanded="true">
            <ul class="post-list-group">
              {% for sub_category in sub_categories %}
                <li class="post-list-group-item">
                  <i class="far fa-folder fa-fw"></i>

                  {% capture _sub_ctg_url %}/categories/{{ sub_category | slugify | url_encode }}/{% endcapture %}
                  <a href="{{ _sub_ctg_url | relative_url }}" class="pos-list-2">{{ sub_category }}</a>

                  {% assign posts_size = site.categories[sub_category] | size %}
                  <span class="text-muted small font-weight-light">
                    {{ '(' -}}
                    {{ posts_size }}
                    {{- ')' }}
                  </span>
                </li>
              {% endfor %}
            </ul>
          </div>
        {% endif %}
      </div>
      <!-- .card -->

      {% assign group_index = group_index | plus: 1 %}
    {% endif %}
  {% endfor %}
</section>
2단계, 모듈의 장착과 적용하려는 공간 설정
모듈 장착하기
자, 이제 완성된 해당 모듈을 불러와야 한다. 모듈을 불러오는 기능을 하는 것은 _layout 폴더에 있는 html 파일들이다. 특히 우측 패널 같은 경우에는 Chirpy의 어떤 곳을 들어가던지 계속 표시된다는 것이 특징이다. 눈치 챘겠지만 default.html 파일에 우측 패널에 대한 선언이 충족되기 때문에 모든 곳에 영향을 미치는 것이다. 해당 파일의 34번 줄을 확인하면 <!-- panel --> 이라는 부분을 확인할 수 있을 것이다. 여기가 패널에 무엇을 넣을지 결정하는 곳이다. 모듈은 페이지 빌드 시 한번 만들어지고, cached 상태로 존재하게 된다. 이것을 적절하게 불러오는 원리다. 해당 부분을 아래와 같이 변경해주자.
1
2
3
4
5
6
7
8
9
10
11
12
13
14
15
          <!-- panel -->
          <!-- 우측 패널을 조절하고 싶다면 이것을 바꾸면 된다. -->
          <aside aria-label="Panel" id="panel-wrapper" class="col-xl-3 ps-2 mb-5 text-muted">
            <div class="access">
              {% include_cached Categories_list.html lang=lang %}
              {% include_cached update-list.html lang=lang %}
              {% include_cached trending-tags.html lang=lang %}
            </div>

            {% for _include in layout.panel_includes %}
              {% assign _include_path = _include | append: '.html' %}
              {% include {{ _include_path }} lang=lang %}
            {% endfor %}
          </aside>
        </div>
단 한 줄만 추가해 준 것 뿐이다. 이러면 이제 홈페이지에서 나의 글 목록을 확인할 수 있다! 아… 그런데 뭔가 아쉽다. 게시글 안으로 들어가면 글 목록과 TOC, 인기 태그와 최근 게시글까지 뜨는 것이 영 복잡하고 그렇다고 최근 게시글과 인기 태그를 없애자니 허전하다. 게시글 속에서만 최근 게시글 및 인기 태그를 없애는 건 어떨까?
선택적으로 글 목록 표시하기
게시글을 보고 있을 때는 TOC가 나타나기 때문에 너무나 많은 정보가 오른쪽에 있으면 복잡해 보인다. 우리는 게시글을 보고 있을 땐 TOC와 글 목록만 보고 싶다. 사실 나만 그렇다. 이것을 수행하기 위해서는 다시 _layout 폴더를 수정할 필요가 있다. 해당 폴더에서 우선 post.html 파일을 열어주자. 맨 위의 코드를 아래와 같이 변경하자.
1
2
3
4
5
6
7
8
9
10
---
layout: modif_panel
refactor: true
panel_includes:
  - toc
tail_includes:
  - related-posts
  - post-nav
  - comments
---
layout으로 되어있는 부분을 임의의 modif_panel로 변경했다. 이는 _layout 폴더에 있는 modif_panel.html 파일을 불러오라는 의미다. 기존에는 default.html을 불러와서 거기에 선언 되어있는 공간들은 모두 default.html에서 처리하고 메인 화면만 post.html에서 처리하고자 하는 것이다. 그렇다면 우리가 할 일은 바로 default.html 과 똑같은 modif_panel을 만들고 우측 패널만 바꿔주면 되는 것이다.
- default.html 파일을 복사하고 이름을 modif_panel로 변경하자.
<!-- panel --> 부분을 아래와 같이 변경하자.
1
2
3
4
5
6
7
8
9
10
11
12
13
14
15
16
17
18
19
20
21
22
23
24
25
26
27
28
29
<!-- panel -->
          <!-- 우측 패널을 조절하고 싶다면 이것을 바꾸면 된다. -->
          <aside aria-label="Panel" id="panel-wrapper" class="col-xl-3 ps-2 mb-5 text-muted">
            <div class="access">
              {% include_cached Categories_list.html lang=lang %}

              <!--
                최근 게시글 및 인기 태그 우측패널에서 제거하였음. liquid 언어로 적힌거라 주석도 이걸로 처리해야한다.
              -->

              {% comment %}
                {% include_cached update-list.html lang=lang %}
                {% include_cached trending-tags.html lang=lang %}
              {% endcomment %}
            </div>


            {% for _include in layout.panel_includes %}
              {% assign _include_path = _include | append: '.html' %}

              <!-- 최근 게시글 및 인기 태그를 포함하지 않도록 하는 코드 추가 -->
              {% if _include_path != 'update-list.html' and _include_path != 'trending-tags.html' %}

                {% include {{ _include_path }} lang=lang %}
              {% endif %}
              <!-- liquid에서 if를 썼으면 끝내주는 곳도 적어줘야 한다. -->
            {% endfor %}
          </aside>
        </div>
이러면 이제 게시글을 읽을 때는 보다 쾌적한 우측 패널이 완성된다. 깔끔하고 이쁘다! 자 이제 정말 마지막이다. 스타일을 손 보도록 하자.
마지막 단계, 스타일 다듬기
스타일 넣겠습니다!
이제 진짜 복사-붙여넣기만 하면 끝난다. _sass/addon/commons.scss 파일에 아래 코드를 추가하자.
1
2
3
4
5
6
7
8
9
10
11
12
13
14
15
16
17
18
19
20
21
22
23
24
25
26
27
28
29
30
31
32
33
34
35
36
37
38
39
40
41
42
43
44
45
46
47
48
49
50
51
52
53
54
55
/* 글목록 스타일 선언 */
ul.post-list-group {
  padding-left: 20px;
}

li.post-list-group-item {
  display: block;
}

a.pos-list-2 {
  margin-right: 0.5rem !important;
  margin-left: 0.5rem !important;
  font-size: 0.95rem;
  color: var(--post-list-text-color);

  &:hover {
    @extend %link-hover;
  }
}

/* 똑같이 ul 선언하여 내부까지 들어가서 post-list에 대한 것을 새롭게 생성하겠음. */

ul {
  li.post-item {
    padding-left: 2.75rem;
    padding-right: 2.75rem;
    opacity: 0.9;
    width: 100%;

    a.post-list {
      @include pt-pb(0.6rem);

      display: flex;
      align-items: center;
      border-radius: 0.75rem;
      font-weight: 600;
      padding-left: 16px;
      padding-right: 16px;
      margin-top: 0.25rem;

      /* 아이콘 스타일이기 때문에 이건 남겨두자. */
      i {
        font-size: 95%;
        opacity: 0.8;
        margin-right: 1.5rem;
      }

      /* 카테고리 끝에 나오는 게시글 개수에 대한 표시 */
      span {
        font-size: 90%;
        letter-spacing: 0.2px;
      }
    }
  }
}
마우스를 해당 카테고리 위에 올렸을 때 색상이 변경될 수 있도록 하는 것은 이미 선언 되어있는 스타일을 재활용 했다. :hover를 이용해 마우스가 위로 올라갔을 때의 설정을 할 수 있으니 참고하면 좋다. 여기서 딱 1가지, --post-list-text-color라는 변수가 아직 어떤 것인지 정해지지 않았다.
글 목록 폰트 색상 추가
홈페이지의 라이트 모드에서는 해당 사항이 없지만 다크 모드에서는 글 목록의 글자들이 링크로 인식되기 때문에 파란색으로 보기 흉하게 나타난다. 시선을 이 쪽에 빼앗길 수 없다. 이를 적절히 처리하기 위해서 .scss 파일을 변경하였다.
1
  --post-list-text-color: darkgrey;
syntax-dark.scss 파일의 @mixin dark-syntax 내부에 위 코드를 추가해주자. 그러면 끝이다. 너무나 이쁜 글 목록이 졸졸 따라다닌다!
추신
좌측 패널에 있던 카테고리는 삭제하지 않았다. 이는 모바일 환경에서 사용되는 메뉴이기 때문에 남겨 놓는 것이 좋을 것으로 판단 했다. 이후에는 네이버 블로그 마냥 게시글의 맨 아래에 세부 글 목록을 만들어 볼까 싶다.